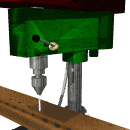
 The Workshop

ENGINE/TRANSMISSION REMOVAL
Simplified engine/transmission
removal can be attained WITHOUT using a lifting block and tackle using
the minimum of tools and equipment:
1.
Disconnect battery.
2.
Remove engine sump guard.
3.
Drain engine oil and water.
4.
Remove R/H front wheel and support - place an axle stand under frame
beneath front suspension unit.
5.
Fit a 1" block between upper arm and rubber. This allows easy removal
of the swivel hub.
6.
Remove brake caliper and hang it up on an S-hook under mudguard.
7.
Remove 2 bolts to the steering arm and fold back out of the way (MKII).
Disconnect tie rod on Mk l.
8.
Remove nut to lower ball joint and use two hammers, simultaneously
striking side on to release taper.
A hydraulic jack placed under tension between
upper and lower arms will help to release.
9.
Remove stabiliser bar and gusset plate to front of vehicle.
10. Disconnect
universal joint.
11. Remove
upper ball joint nut, strike with two hammers simultaneously.
Assembly will fall under it's own weight.
12. Withdraw
hub/shaft assembly.
13. Repeat
steps 4 to 12 on the L/H side.
14. Remove
exhaust clamps and fittings throughout and remove complete exhaust
system in situ.
15. Remove
gear lever inside car and stuff some clean rag into the hole to prevent
dirt entering.
16. Loosen
the three nuts to the gear-change assembly.
Remove the front nut but leave the rear two nuts
on at least a couple of threads.
17. Disconnect
cables, hoses, etc. to carburettor, speedometer, heater, radiator,
manifold and fuel pump.
18. Remove
clutch slave cylinder leaving hydraulic pipe attached, carburettor,
exhaust manifold completely, solenoid, and all electrical leads
to starter motor, coil, distributor, alternator, and temperature unit,
(identifying each with masking tape or similar).
19. Remove
distributor cap.
20. Place
two 3"x 2" timber battens underneath engine.
21. Use
two or three jacks in conjunction with the Austin jack, lower car
to floor in easy stages.
NEVER use two Austin jacks together, as the car
will fall sideways.
22. Release
the two nuts to gear-change inside car and lower assembly to floor.
23. Remove
bolts to engine mounting channel and remove the two rear engine mounts.
24. Remove
L/H side exhaust engine mount.
25. Remove
R/H side alternator engine mount.
26. Raise
the car in easy stages, sufficiently to clear motor and then pull/slide
complete motor/transmission assembly forward.
Using this method, the assembly can be removed from the
car in two to three hours. An added advantage is the motor can be
easily test run before fitting to the car, with the oil and cooling
systems filled.
ENGINE VENTILATION
The correct operation of
the ventilation assembly near the carburettor on manifold is essential
to prevent crankcase pressure build up and oil leaks.
Clean thoroughly and fit
a new diaphragm (as used in the four-cylinder Landrover).
If you use a sealed cap
or seal the old vent hole under side filler cap with a self-tapping
screw, the engine will have a slight internal vacuum. The engine ventilates
all right and there is absolutely no oil leaks.
This method has been tested
on at least ten cars over a period of five years.
SUSPENSION
The 1800 Hydrolastic suspension
can combine exceptional ride and handling with reliability if these
points are adhered to:
1. Check
displacer housings regularly for signs of fluid leaks especially if
one side is lower.
Early detection of a leak will lessen the chance of
displacer failure on the road.
2. If
front of car does not have correct ride height at recommended pressure,
de-pressurise the suspension (a fitting can be made up from a tyre
inflator connector), retaining the fluid. Remove the lower bolt from
the alloy housing and the two small top bolts. IF the two middle studs
are removed by fitting locknuts over the 'niloc' nuts, THEN nothing
else need be removed, the housing will pivot away sufficiently to
allow displacer removal.
If your problem is simply
low ride height, THEN fit about three or four large washers (to approx
.25" thickness) where the pivot ball pin fits into the displacer,
refitting the ball end carefully with new grease. Fit these washers
to front displacer pins only. When replacing a displacer, check that
the original mulatoc disc (if used) at the base or hose end is retained.
Check the hoses for signs of leaks and the rubber diaphragms both
ends for signs of perishing or leakage. A Company such as REPCO can
refit a hose assembly to a displacer using new high-pressure fittings.
3. It
is better to consistently carry some weight in your boot for a couple
of reasons:
* by
displacement, this will increase your front ride height.
* lessens
the likelihood of rear displacement failure when loads (e.g. passengers)
are occasionally carried in the back, by flexing the diaphragm consistently.
Try 30 to 50 lbs weight
(a good sized toolbox or a small bag of sand).
4. If
you're mechanically minded, a portable suspension pump can be made
from the little pump inside an old refrigerator unit. Discard the
electric motor section. Fit a handle and suitable fittings to the
pump section. This will evacuate as well as pressurise. A pressure
gauge is easy to obtain.
5. The
pivot arms or swing arms have either nylon bushes or tapered roller
bearings, depending on the model. These would last a lifetime if the
grease did not dry out. For the rear pivot, drill the hollow-arm housing,
tap and fit a grease nipple. For the front pivot, this can be done
in situ if you use a drill and tap to suit little Japanese grease
nipples. Fill with grease (the rear will take quite a lot initially).
Alternatively, Tasman or Kimberley rear pivot arms (reverted to taper
bearings) can be substituted.
6. The
ball joints are adjustable and can be completely dismantled, cleaned
and repaired.
The dust boots are critical in preventing wear. Originals
are Nila, but others such as Landrover tie-rod (Part No 214649) boot
will fit. As the top ball joint carries the most weight, drill the
arm centrally from the top into the nylon cup, fit a grease nipple
and grease regularly.
Be sure to tighten and
bend the lock plate back and check the housing for looseness afterwards.
7. With
the Mk l, check the hose on the rear displacer where it curves around
toward the under-frame. For some reason the hose chafes occasionally.
This can cause displacer failure. A compression joint will cure the
problem.
Official Recipe for Hydrolastic
Fluid:
The liquid is a solution
of 49% alcohol, 49% distilled water, 1 % triethanolamine phosphate
and 1% sodium mercaptobenzthiazole, which is of constant viscosity
and has a freezing temperature of 31 degrees C. According to BMC,
the particular reason this fluid is used instead of distilled water
with an antifreeze is that this fluid IS an antifreeze solution of
constant viscosity containing a rust inhibitor with an agent added
to make the fluid distasteful. (This last was a legal requirement.)
A 50-50 mixture of methylated
spirit and antifreeze (with a little radiator anti-corrosion added)
can be used successfully with no adverse effects.
There were variations in
the formula for Hydrolastic fluid between the UK and Australia. The
firm of H.C. Sleigh (Golden Fleece) marketed a fluid to the following
specification: Alcohol 50%, Water 24.45%, Bentmazol 0.05%, Ethylene
Glycol 3%, (Bomar)? 0.50%, Union Carbide HB5100 22% (this is a viscosity
improver).
STEERING AND WHEEL ALIGNMENT
Properly maintained, the
1800 is delightful.
Neglected, it steers poorly
and gobbles tyres up, especially the front tyres.
Check the tie-bar bushes
located at the front of the underbody for wear.
Check the lower inner bushes
for wear and replace if worn or sagged.
Check that the top arm
and swivel hub assemblies on Mk ll have not been mismatched.
* Type
1: Top arm has a raised rib parallel with sides of arm. Use with swivel
hub marked with raised letter 'M'.
* Type
2: Top arm has a raised rib at right angles to the sides of the arm.
Use with swivel hub marked with a letter 'P'.
These changes were made
to alter caster and, IF they have been unknowingly mis-matched, can
lead to the steering pulling to one side.
Ride height must be within
limits. 14" to 15.5" from front hub spindle to under-edge of mudguard.
Adjust rack and pinion
as per manual and check for wear of bush at L/H end. Replace with
nylon bush. DO NOT over-tighten the ball socket on ends of the rack.
Replace rubber boots if leaking and ensure assembly is properly lubricated.
Check toe-in regularly
and set carefully to suit tyre type.
Any wear in the swing arm
bearings/bushes, ball joints and wheel bearings must be corrected
before attempting a wheel alignment.
DRIVESHAFT, CV JOINTS and WHEEL BEARINGS
CV joints are exceptionally
durable provided the boots are not punctured.
Check the CV boots regularly
(dirt and grit cause premature wear). CV's will usually come
off the shaft with the sharp tap of a lead mallet. If difficult to
refit, remove the circlip that holds CV in place, carefully close
it up and refit to shaft.
Driveshafts utilising steel
universal joints were fitted to automatic models. These driveshafts
will fit a manual model and the steel universal lasts much longer,
is cheaper to replace, and can be removed with the shaft for service.
NEVER use any grease other than
Molybdenum Disulphide type for the lubrication of CV joints.
If experiencing wheel bearing
problems, or wobble and tyre wear, check the big nut on the front
hub for looseness or signs of movement. This is always caused by movement
of the driveshaft in the hub spline. Dismantle, clean, inspect and
replace worn parts; when refitting always use the correct grade Loctite
(from REPCO or Bearing Services) on the driveshaft and hub splines.
Use Loctite primer to clean
away all traces of grease.
The large nut on the front
hub needs to be very tight and requires the use of an extension bar
to tighten. Workshop manual specifies 150 ft. lbs.
If wheel wobbles or disc
has run out (not due to tyre imbalance), position hub 6 or 8 splines
from the previous position. Mark the relative position of shaft and
hub if OK before dismantling.
If 'cracking or clicking'
sounds come from CV joints when driving forward/reverse ON FULL LOCK,
this indicates wear and will require replacement. Before buying new
ones, try replacing the joint with new balls (bearings). The size
is 21/32" and available from specialist bearing outlets.
The CV rubber boot fitted
to the early model Subaru 4wd will fit the Austin 1800.
THE BRAKING SYSTEM
One of the best braked
cars on the road, the 1800 has very little trouble in this area.
Keep the adjusters free
and adjust the Mk l rear wheels regularly. Mk ll's are self
adjusting.
Mk l and early Mk ll boosters
are not as good as the PBR-VH40. It's cheaper and better to fit the
PBR-VH40, late Mk ll type, to earlier vehicles if they have booster
troubles.
If the PBR-VH40 gives trouble
it will nearly always be confined to a split in the diaphragm actuating
or the diaphragm sensing (small). Both are easily replaced.
Brake squeal is usually
due to glazed discs and or pads. Roughen them with emery cloth.
Boosters are available
on an exchange basis, rather than repair it yourself if you're not
confident.
Most brake problems such
as hard pedal, intermittent operation, vacuum leak, brake fluid reaching
a hot manifold causing white smoke, can be traced to booster faults,
particularly in early models.
The Mk ll 1800 booster
seems the least affected and more reliable.
Sudden low pedal, or poor
brakes in dual circuit systems is due to one circuit failure.
Rear brake linings, cylinder
and complete assemblies are common to the Australian model HR Holden
(only Mk ll and with PBR brakes only).
More Hints and Tips
The 'B' series engine is
very reliable and a flexible hard working unit.
Watch these points:
* Cars
not often used or stored for some time can develop very serious bearing
electrolysis especially on the connecting rod bearings. This can result
in a fairly low mileage car throwing a conrod.
* The
result of neglect, poor oil or an oil filter not changed regularly,
can cause a build up of acids, etc. in the oil. Acids attack the bearing
metal, causing it to corrode away from the steel shell.
* Overheating:
Have the radiator cleaned
professionally if possible. Replace the thermostat, and remove plugs
from the engine block and clean accumulated scale. Undo the drain
plug and clean out the sediment buildup. Scale or sediment causes
most overheating problems. Use good quality inhibitor and avoid mixing
brands. The engine should never overheat if these points are adhered
to.
* Following
a motor overhaul prime the whole system with oil first. As the oil
is slow to be picked up, a set of new bearings can be ruined before
full oil pressure develops. Cranking the engine over with the plugs
removed for about a minute should suffice.
* Oil
on the clutch assembly can be traced to a failure of the rear seal
in the engine or the clutch shaft seal. Sometimes the seal trench
may be loose or worn.
* When
overhauling the motor, don't forget to remove the primary
oil strainer located at the front of the engine (near the speedometer
drive). This strainer incorporates a magnetic ring that must be thoroughly
cleaned, along with the strainer.
CARBURETTOR AND TUNING
The SU carburettor used
on the 1800 is very reliable and provides good economy. For greatly
improved performance without sacrificing cruising economy, fit 2 x
1.75" SU's and extractors.
MGB's can be adapted.
If hard to tune, or using
excessive fuel, replace the needle, seat and main jet (Part No TK
6001) with a matching needle. Using a different grade of oil in the
damper will alter acceleration characteristics.
The main jet and needle
are critical to good tuning and economy, and should be replaced if
in doubt.
The vacuum advance diaphragm
on the distributor is prone to leaks after a few years.
Test to see if it holds
vacuum - if not, replace.
The two excess fuel drain
holes under the inlet manifold next to the head are prone to fail
and suck air. Remove and plug with a ¼" SAE bolt.
The ventilator diaphragm
can fracture and leak. Replace it with an identical part used on the
Series 3 Landrover.
The booster on the brake
system can leak and admit excess air. Test by blanking off the vacuum
line.
Blanking off the small
hole in the oil filler cap underside with a self tapping screw prevents
dust entry, helps prevent engine oil leaks yet still allows engine
ventilation. However, setting up an engine breather vacuum to overcome
oil leaks would be risky in dusty conditions because, with heavy equipment,
severe wear of seals and seal bosses occur with engine vacuum conditions.
Air cleaner to carby seal.
Use an O-ring from a discarded oil filter.
Air cleaner bolt stripped?
Braze a nut inside a small
piece of ½" tube and a large one over it to make a replacement.
SU Carburettor - Needles
and Springs Fitted to Landcrabs:
MODEL
NEEDLE
SPRING
COLOUR
Rich
Standard Weak
Australian Production
Mk l
SW TW CIW Yellow
Mk ll
SL Yellow
----------------------------------------------------------------------------------------------------
U.K. Production
Mk l
SW TW CIW
Yellow
Mk ll 68/70
SA ZH CIW Yellow
Mk ll 69/72
(Canada)
BAJ Yellow
Mk ll S
CI TZ
CIW
Red
Mk ll 71/72,
71/74 auto
SA ZH CIW
Yellow
Mk ll (ECE)
BBF Yellow
Mk ll '72/'73
ZH
Yellow
2200 BBD Red
220 (ECE)
BBN Red
Note:
The Mk l and Mk ll carburettors
must only be changed with the correct manifold because the Mk l is
30º semi-downdraught while the Mk ll is 20º.